Custom domains and SSL/TLS certificates (FREE)
Introduced in GitLab 15.4, you can use verified domains to bypass user email confirmation for SAML- or SCIM-provisioned users.
You can use custom domains:
- With GitLab Pages.
- To bypass user email confirmation for SAML- or SCIM-provisioned users. When using custom domains this way, you use the GitLab Pages feature but can skip the requirements.
To use one or more custom domain names:
Set up a custom domain
To set up Pages with a custom domain name, read the requirements and steps below.
Requirements
-
A GitLab Pages website up and running, served under the default Pages domain (
*.gitlab.io, for GitLab.com). -
A custom domain name
example.comor subdomainsubdomain.example.com. -
Access to your domain's server control panel to set up DNS records:
- A DNS record (
A,ALIAS, orCNAME) pointing your domain to the GitLab Pages server. If there are multiple DNS records on that name, you must use anALIASrecord. - A DNS
TXTrecord to verify your domain's ownership.
- A DNS record (
-
Set either
external_httporexternal_httpsin/etc/gitlab/gitlab.rbto the IP and port of your Pages Daemon. If you don't have IPv6, you can omit the IPv6 address.Example:
# Redirect pages from HTTP to HTTPS
gitlab_pages['external_http'] = ['192.0.2.2:80', '[2001:db8::2]:80'] # The secondary IPs for the GitLab Pages daemon
gitlab_pages['external_https'] = ['192.0.2.2:443', '[2001:db8::2]:443'] # The secondary IPs for the GitLab Pages daemon
Steps
Follow the steps below to add your custom domain to Pages. See also this document for an overview on DNS records.
1. Add a custom domain
To add your custom domain to GitLab Pages:
- On the top bar, select Main menu > Projects and find your project.
- On the left sidebar, select Settings > Pages.
- In the top right, select New Domain.
- In Domain, enter your domain.
- Optional. In Certificate, turn off the Automatic certificate management using Let's Encrypt toggle to add an SSL/TLS certificate. You can also add the certificate and key later.
- Select Create New Domain.
2. Get the verification code
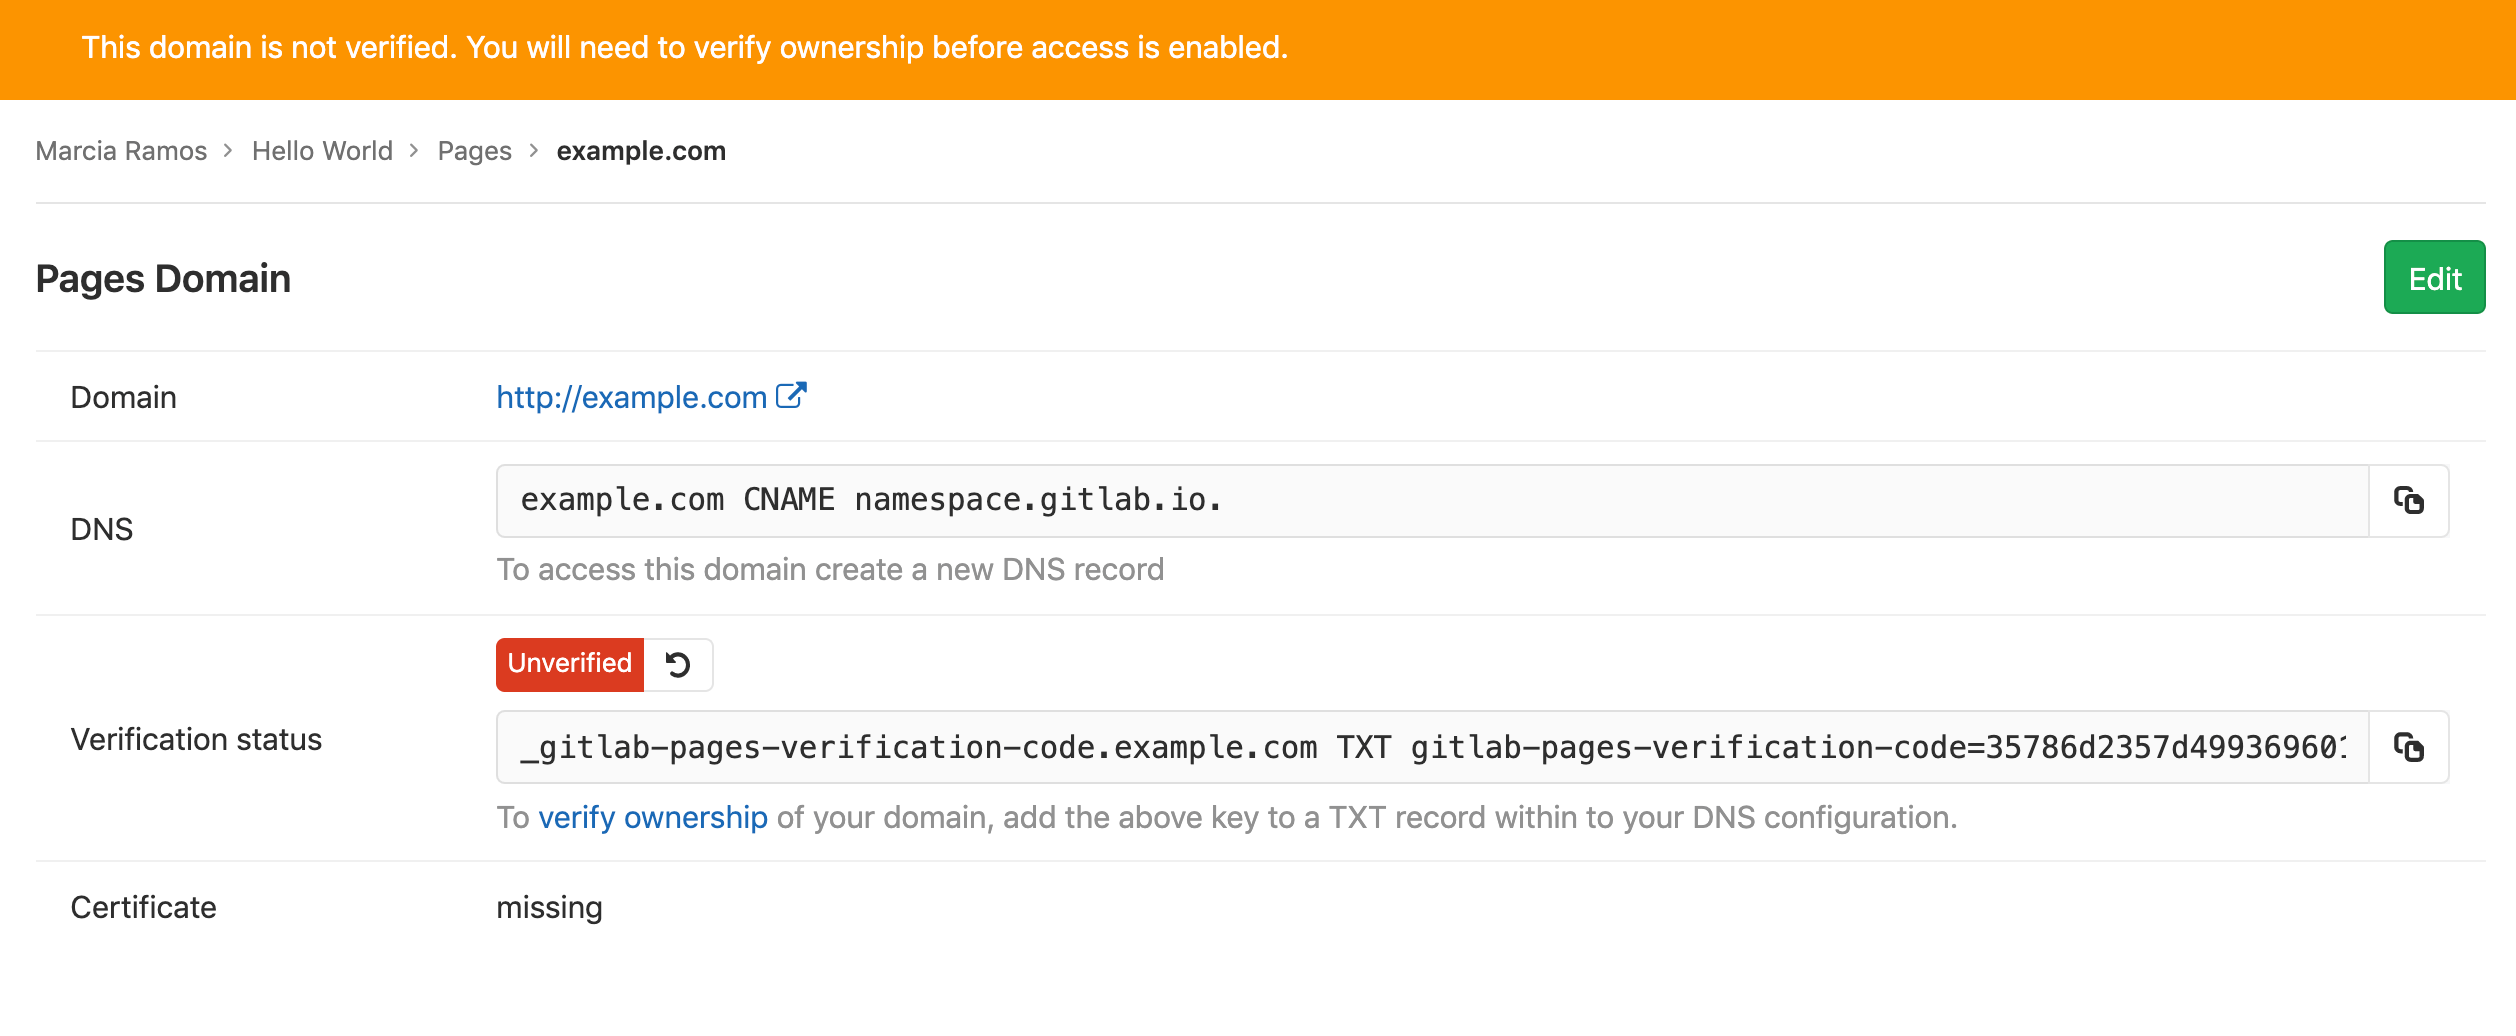
After you add a new domain to Pages, the verification code prompts you. Copy the values from GitLab
and paste them in your domain's control panel as a TXT record on the next step.
3. Set up DNS records
Read this document for an overview of DNS records for Pages. If you're familiar with the subject, follow the instructions below according to the type of domain you want to use with your Pages site:
-
For root domains,
example.com. -
For subdomains,
subdomain.example.com. - For both.
You can configure IPv6 on self-managed instances, but IPv6 is not currently configured for Pages on GitLab.com. Follow this issue for details.
For root domains
Root domains (example.com) require:
- A DNS
Arecord pointing your domain to the Pages server. - A
TXTrecord to verify your domain's ownership.
| From | DNS Record | To |
|---|---|---|
example.com |
A |
35.185.44.232 |
_gitlab-pages-verification-code.example.com |
TXT |
gitlab-pages-verification-code=00112233445566778899aabbccddeeff |
For projects on GitLab.com, this IP is 35.185.44.232.
For projects living in other GitLab instances (CE or EE), contact
your sysadmin asking for this information (which IP address is Pages
server running on your instance).
WARNING:
Note that if you use your root domain for your GitLab Pages website
only, and if your domain registrar supports this feature, you can
add a DNS apex CNAME record instead of an A record. The main
advantage of doing so is that when GitLab Pages IP on GitLab.com
changes for whatever reason, you don't need to update your A record.
There may be a few exceptions, but this method is not recommended
as it most likely doesn't work if you set an MX record for your root domain.
For subdomains
Subdomains (subdomain.example.com) require:
- A DNS
ALIASorCNAMErecord pointing your subdomain to the Pages server. - A DNS
TXTrecord to verify your domain's ownership.
| From | DNS Record | To |
|---|---|---|
subdomain.example.com |
ALIAS/CNAME
|
namespace.gitlab.io |
_gitlab-pages-verification-code.subdomain.example.com |
TXT |
gitlab-pages-verification-code=00112233445566778899aabbccddeeff |
Note that, whether it's a user or a project website, the DNS record
should point to your Pages domain (namespace.gitlab.io),
without any /project-name.
For both root and subdomains
There are a few cases where you need to point both the subdomain and root
domain to the same website, for instance, example.com and www.example.com.
They require:
- A DNS
Arecord for the domain. - A DNS
ALIAS/CNAMErecord for the subdomain. - A DNS
TXTrecord for each.
| From | DNS Record | To |
|---|---|---|
example.com |
A |
35.185.44.232 |
_gitlab-pages-verification-code.example.com |
TXT |
gitlab-pages-verification-code=00112233445566778899aabbccddeeff |
| ---------------------------------------------------+------------+------------------------ | ||
www.example.com |
CNAME |
namespace.gitlab.io |
_gitlab-pages-verification-code.www.example.com |
TXT |
gitlab-pages-verification-code=00112233445566778899aabbccddeeff |
If you're using Cloudflare, check
Redirecting www.domain.com to domain.com with Cloudflare.
Notes:
- Do not use a
CNAMErecord if you want to point yourdomain.comto your GitLab Pages site. Use anArecord instead.- Do not add any special chars after the default Pages domain. For example, don't point
subdomain.domain.comto ornamespace.gitlab.io/. Some domain hosting providers may request a trailing dot (namespace.gitlab.io.), though.- GitLab Pages IP on GitLab.com was changed in 2017.
- GitLab Pages IP on GitLab.com has changed from
52.167.214.135to35.185.44.232in 2018.
4. Verify the domain's ownership
Once you have added all the DNS records:
- Go back at your project's Settings > Pages (Note: this may also be located at Deployments > Pages, more information).
- Locate your domain name and select Details.
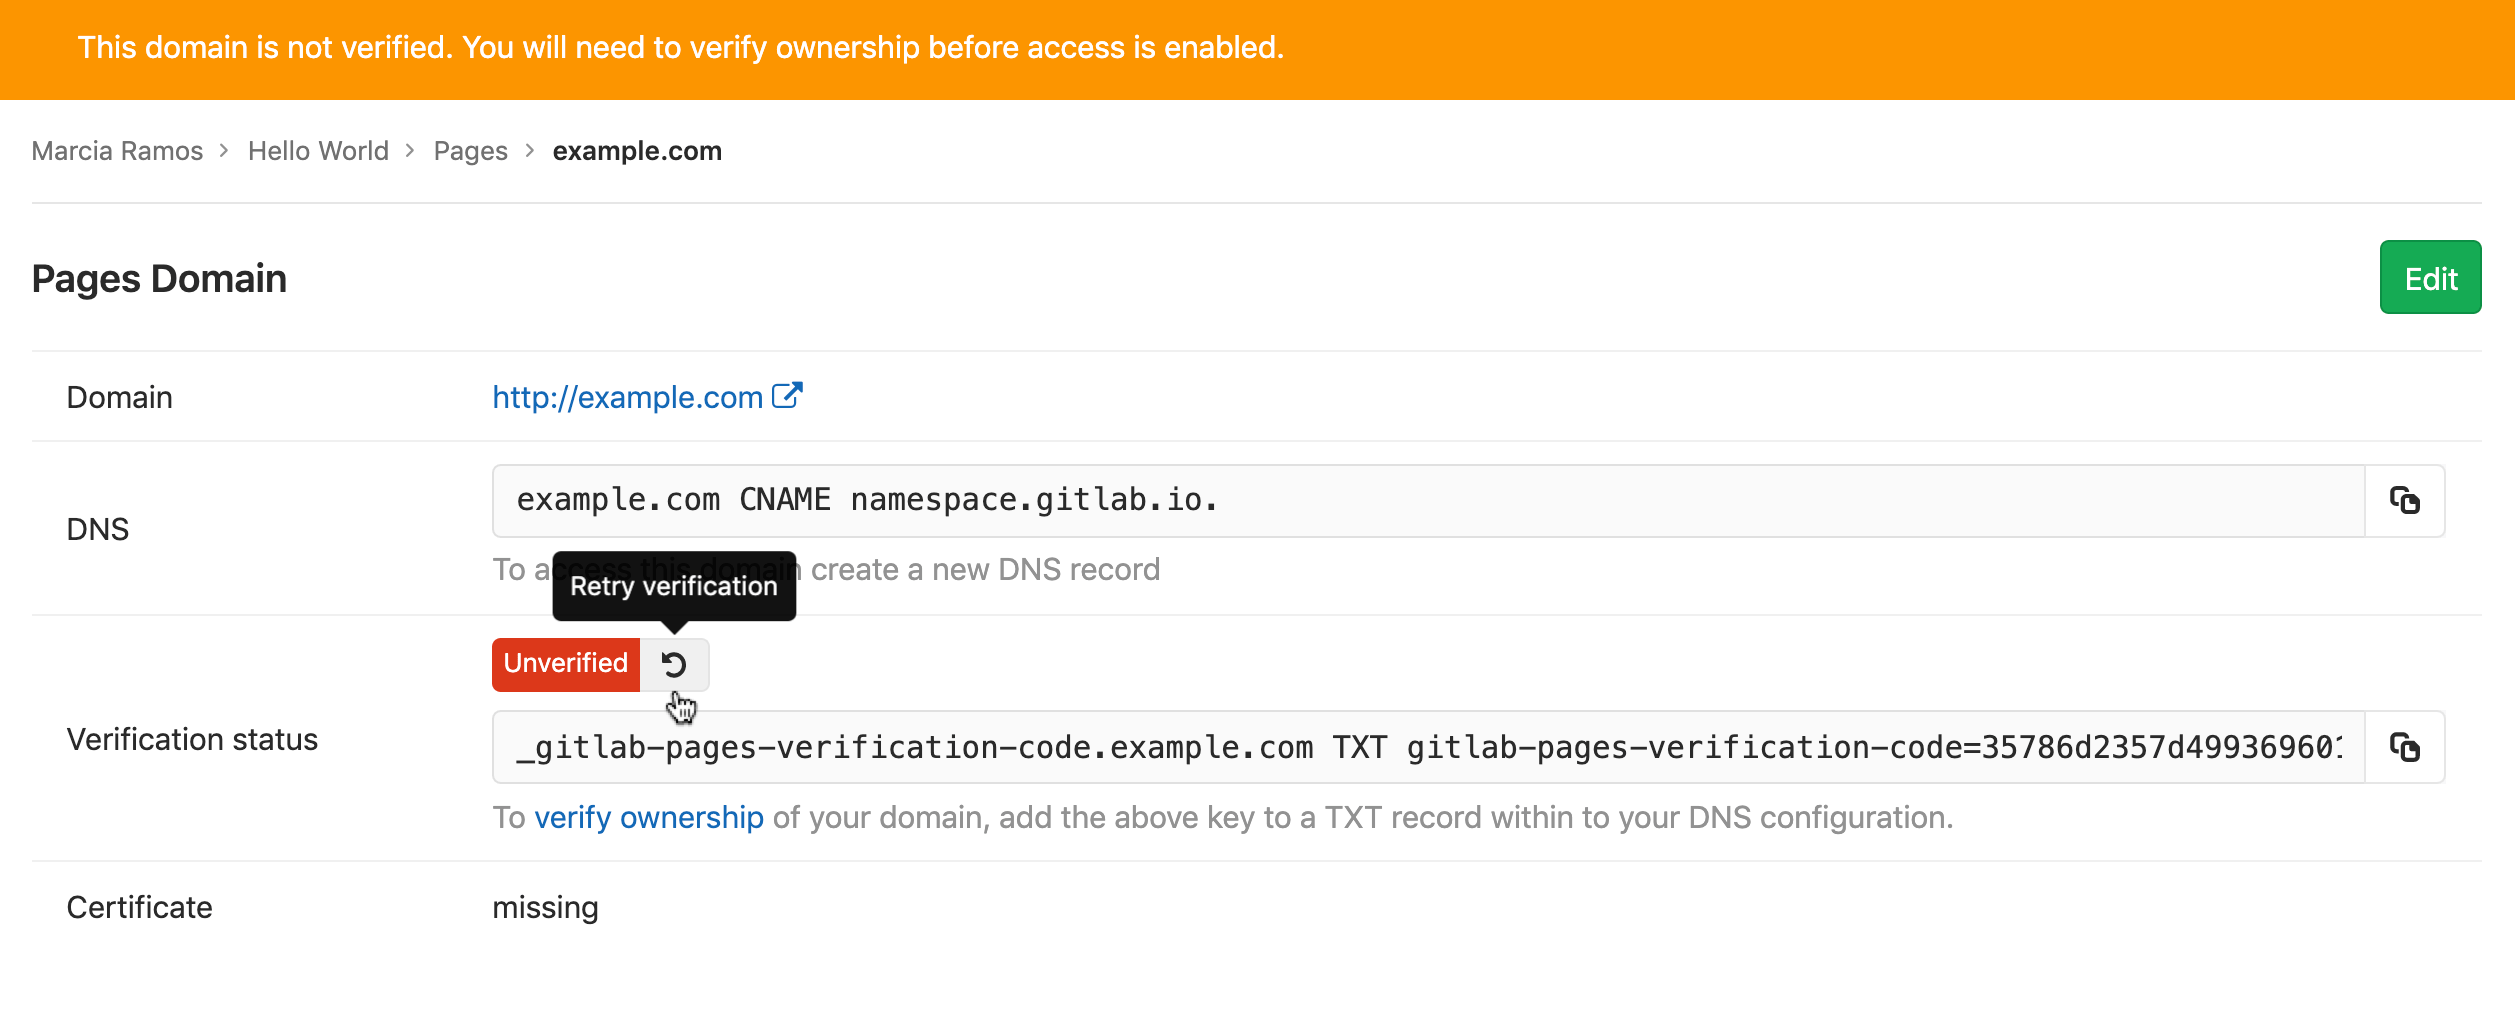
- Select the Retry verification button to activate your new domain.
As soon as your domain becomes active, your website is available through your domain name.
WARNING: Considering GitLab instances with domain verification enabled, if the domain can't be verified for 7 days, it's removed from the GitLab project.
Notes:
- Domain verification is required for GitLab.com users; for GitLab self-managed instances, your GitLab administrator has the option to disabled custom domain verification.
- DNS propagation may take some time (up to 24h), although it's usually a matter of minutes to complete. Until it does, verification fails, and attempts to visit your domain result in a 404.
- Once your domain has been verified, leave the verification record in place. Your domain is periodically reverified, and may be disabled if the record is removed.
Troubleshoot domain verification
To manually verify that you have properly configured the domain verification
TXT DNS entry, you can run the following command in your terminal:
dig _gitlab-pages-verification-code.<YOUR-PAGES-DOMAIN> TXTExpect the output:
;; ANSWER SECTION:
_gitlab-pages-verification-code.<YOUR-PAGES-DOMAIN>. 300 IN TXT "gitlab-pages-verification-code=<YOUR-VERIFICATION-CODE>"
In some cases it can help to add the verification code with the same domain name as you are trying to register.
For a root domain:
| From | DNS Record | To |
|---|---|---|
example.com |
TXT |
gitlab-pages-verification-code=00112233445566778899aabbccddeeff |
_gitlab-pages-verification-code.example.com |
TXT |
gitlab-pages-verification-code=00112233445566778899aabbccddeeff |
For a subdomain:
| From | DNS Record | To |
|---|---|---|
www.example.com |
TXT |
gitlab-pages-verification-code=00112233445566778899aabbccddeeff |
_gitlab-pages-verification-code.www.example.com |
TXT |
gitlab-pages-verification-code=00112233445566778899aabbccddeeff |
Add more domain aliases
You can add more than one alias (custom domains and subdomains) to the same project. An alias can be understood as having many doors leading to the same room.
All the aliases you've set to your site are listed on Setting > Pages. From that page, you can view, add, and remove them.
Redirect www.domain.com to domain.com with Cloudflare
If you use Cloudflare, you can redirect www to domain.com
without adding both www.domain.com and domain.com to GitLab.
To do so, you can use Cloudflare's page rules associated to a
CNAME record to redirect www.domain.com to domain.com. You
can use the following setup:
- In Cloudflare, create a DNS
Arecord pointingdomain.comto35.185.44.232. - In GitLab, add the domain to GitLab Pages and get the verification code.
- In Cloudflare, create a DNS
TXTrecord to verify your domain. - In GitLab, verify your domain.
- In Cloudflare, create a DNS
CNAMErecord pointingwwwtodomain.com. - In Cloudflare, add a Page Rule pointing
www.domain.comtodomain.com:- Navigate to your domain's dashboard and select Page Rules on the top nav.
- Select Create Page Rule.
- Enter the domain
www.domain.comand select + Add a Setting. - From the dropdown list, choose Forwarding URL, then select the status code 301 - Permanent Redirect.
- Enter the destination URL
https://domain.com.
Adding an SSL/TLS certificate to Pages
Read this document for an overview on SSL/TLS certification.
To secure your custom domain with GitLab Pages you can opt by:
- Using the Let's Encrypt integration with GitLab Pages, which automatically obtains and renews SSL certificates for your Pages domains.
- Manually adding SSL/TLS certificates to GitLab Pages websites by following the steps below.
Manual addition of SSL/TLS certificates
You can use any certificate satisfying the following requirements:
- A GitLab Pages website up and running accessible via a custom domain.
- A PEM certificate: it is the certificate generated by the CA, which needs to be added to the field Certificate (PEM).
- An intermediate certificate: (aka "root certificate"), it is the part of the encryption keychain that identifies the CA. Usually it's combined with the PEM certificate, but there are some cases in which you need to add them manually. Cloudflare certs are one of these cases.
- A private key, it's an encrypted key which validates your PEM against your domain.
For example, Cloudflare certificates meet these requirements.
Steps
- To add the certificate at the time you add a new domain, go to your project's Settings > Pages > New Domain (Note: this may also be located at Deployments > Pages, more information), add the domain name and the certificate.
- To add the certificate to a domain previously added, go to your project's Settings > Pages, locate your domain name, select Details and Edit to add the certificate.
NOTE: The Pages menu entry may also be located at Deployments > Pages, more information
- Add the PEM certificate to its corresponding field.
- If your certificate is missing its intermediate, copy and paste the root certificate (usually available from your CA website) and paste it in the same field as your PEM certificate, just jumping a line between them.
- Copy your private key and paste it in the last field.
Do not open certificates or encryption keys in regular text editors. Always use code editors (such as Sublime Text, Atom, Dreamweaver, Brackets, etc).
Force HTTPS for GitLab Pages websites
To make your website's visitors even more secure, you can choose to force HTTPS for GitLab Pages. By doing so, all attempts to visit your website through HTTP are automatically redirected to HTTPS through 301.
It works with both the GitLab default domain and with your custom domain (as long as you've set a valid certificate for it).
To enable this setting:
- Navigate to your project's Settings > Pages (Note: this may also be located at Deployments > Pages, more information).
- Tick the checkbox Force HTTPS (requires valid certificates).
If you use Cloudflare CDN in front of GitLab Pages, make sure to set the SSL connection setting to
full instead of flexible. For more details, see the Cloudflare CDN directions.


